
Standing Seam Solar Clamps: How to Check Roof Profile Compatibility
Choosing the wrong mounting hardware for a metal roof can lead to some serious headaches, like leaks, panel damage, or an insecure array. With so much riding on a simple piece of metal, the pressure is on to get it right. We've seen firsthand how a small mismatch can void a roof warranty and put a multi-decade investment at risk. That's why understanding how to check for compatible standing seam solar clamps isn't just a good idea—it's a critical step for any successful project.
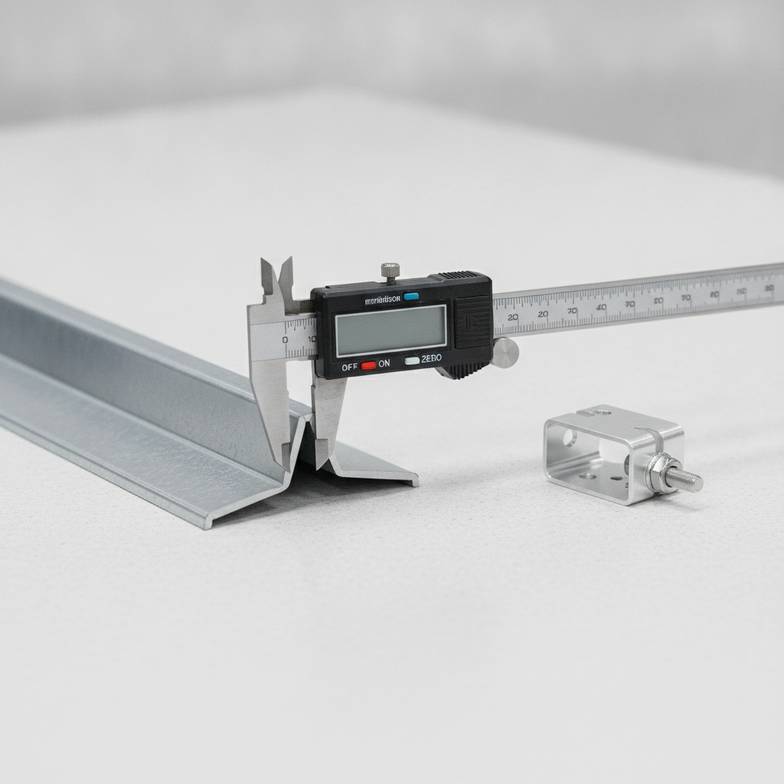
To check roof profile compatibility for standing seam solar clamps, you must go beyond the roof panel's brand name. The most reliable method is to physically measure the seam's height, width, and material thickness, or obtain these specs from the roof manufacturer's technical data sheet. Compare these dimensions to the clamp's specifications, paying close attention to the clamping mechanism and material to prevent damage and galvanic corrosion. The ultimate confirmation comes from testing a sample clamp on an actual piece of the roof panel.
That's the short answer, but as any installer knows, the real work is in the details. What exactly should you measure? What hidden risks are you looking for? Let's break down the process we use to guide our clients so you can source your next project's hardware with complete confidence.
Why Can't I Just Match the Roof Panel's Name to My Standing Seam Solar Clamps?
It seems like it should be easy, right? You have a "snap-lock" roof, so you should just be able to order "snap-lock" clamps. But if you've been in this industry for a while, you know that what seems easy is often a trap. Relying on a profile's name is one of the most common—and riskiest—shortcuts you can take. Let's unpack why this approach is flawed and what you should be focusing on instead.
The simple reason you can't just match by name is that there is no industry-wide standard for these terms. A "mechanical lock" profile from one manufacturer can have completely different dimensions and geometry from a "mechanical lock" profile made by someone else. Compatibility is all about the physical fit and material science, not marketing terminology.
The "Snap-Lock" and "Mechanical-Lock" Illusion
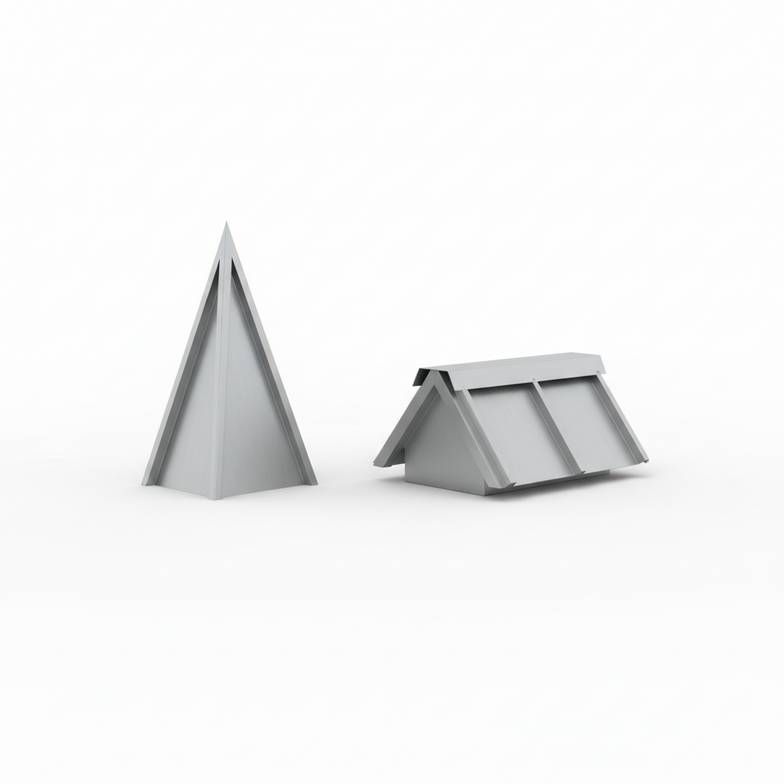
At a high level, these names describe how the seams are joined.
Snap-lock profiles feature a male and female edge that snap together during installation.
Mechanical-lock profiles require a special seaming tool to fold the edges of adjacent panels over each other, creating a single or double fold.
While the installation method differs, the final geometry is what matters for a clamp. Within each of these categories, there are dozens of variations in height, width, and shape. I can't tell you how many times a client has called us asking for clamps for a "standard" standing seam roof. After we ask for a few photos and measurements, we often discover it’s a unique profile that requires a very specific clamp solution. Relying on the name alone is a gamble.
What to Measure Instead
To get an accurate match, you need to ignore the name and become a detective. Grab a set of calipers and a tape measure, or better yet, get your hands on the roof panel's official technical data sheet. Here is what you need to document:
Seam Height: Measure the distance from the flat "pan" of the roof panel to the very top of the seam.
Seam Top Width: Measure the width across the very top of the seam. This is critical for clamps that grip over the top.
Seam Base Width: Measure the width where the seam begins to rise from the pan. Some clamps grip lower on the seam.
Material Thickness: Use a micrometer if possible to get the thickness of the roof panel's metal. This is crucial for determining how much pressure the clamp's set screws can apply without causing damage.
Here's a quick example of why this matters. Two different roof systems could both be called "Architectural Snap-Lock," but their real-world dimensions might look like this:
| Dimension | Profile "A" (Manufacturer 1) | Profile "B" (Manufacturer 2) |
|---|---|---|
| Seam Height | 1.5" (38 mm) | 1.75" (44 mm) |
| Seam Top Width | 0.5" (12.7 mm) | 0.4" (10.2 mm) |
| Material | 24-gauge Steel | 22-gauge Steel |
A clamp designed for Profile "A" would be too loose on Profile "B," leading to a weak connection. A clamp for "B" might not even fit over "A," or it could crush the seam if forced. This is why precise dimensions are non-negotiable.
What Are the Real Risks of Using the Wrong Standing Seam Solar Clamps?
You might think the worst that can happen with a bad clamp is that the array slides off the roof. That’s definitely a major concern, but the damage can often be much more subtle and insidious. Using the wrong standing seam solar clamps can introduce problems that you won't discover until years later, long after the installation crew has left. We'll explore the hidden failure modes that can compromise the roof and your entire solar investment.
The risks of an incompatible clamp go far beyond a loose fit. They include deforming the seam, which can break the weather-tight seal and cause leaks; crushing the seam material, which leads to metal fatigue and cracks; and creating point-load stress that could void the roof's multi-decade warranty. A good clamp doesn't just grip—it grips without causing harm.
Deforming the Seam: The Silent Leak-Starter
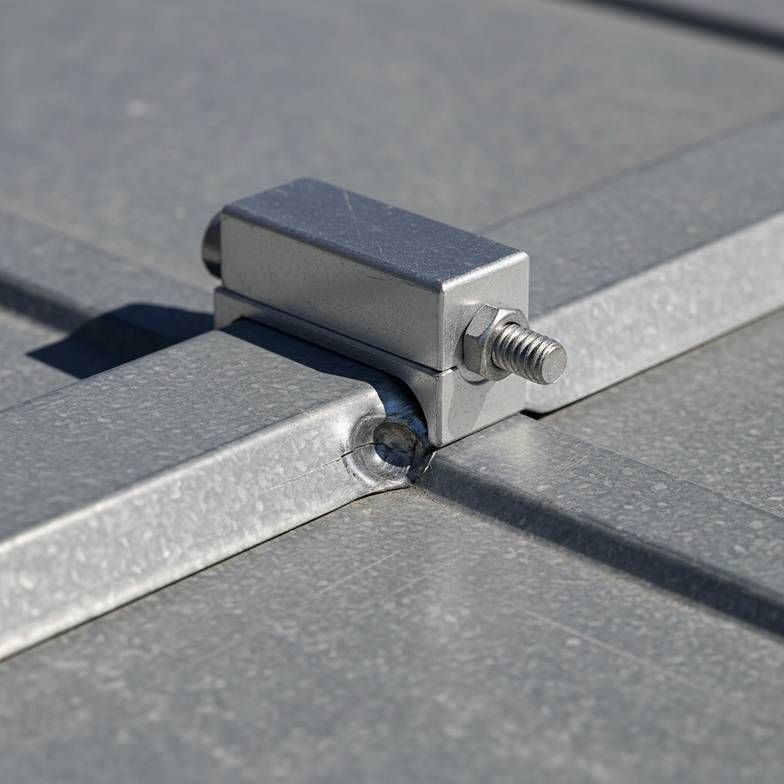
Standing seam roofs are prized for their weather tightness, which comes from the integrity of the raised seam. The jaws of a solar clamp must perfectly match the contours of this seam. If the clamp's shape is wrong or it's too small, it will apply pressure in the wrong places when tightened. This can bend or deform the seam, breaking the factory-formed seal between the panels. Even a tiny deformation can create a capillary path for water to get drawn under the seam, leading to slow, hidden leaks that can cause rot, mold, and structural damage over time.
Set Screw Over-Torquing and Dimpling
The small set screws on a clamp are the components that do the actual gripping. Their job is to create friction against the seam through pressure—not to pierce the metal. Many installers, when faced with a clamp that doesn't feel secure, make the mistake of simply tightening the set screws further. If the clamp isn't the right fit, over-torquing the screws will do one of two things:
Dimple the Seam: The screw tip will press into the metal, creating a small dent. This dimple is a major stress concentration point that can lead to cracks from thermal expansion and contraction. It also damages the protective coating on the metal, opening the door for rust.
Strip the Screw: The threads on the clamp or the screw itself can strip, leaving you with no clamping force at all.
To avoid this, always follow these best practices:
Use a calibrated torque wrench for every single set screw.
Strictly follow the torque values specified by the clamp manufacturer.
Ensure the set screw's tip (e.g., rounded, cup point) is designed for your roof material. A pointed tip meant for one metal might be too aggressive for another.
Voiding the Roof Warranty
Perhaps the biggest financial risk is voiding the roof's warranty. Metal roof manufacturers often provide warranties for 20, 30, or even 40 years, but these warranties come with strict conditions. Almost all of them are voided if attachments are installed improperly or cause damage to the panels. By using a clamp that hasn't been verified for your specific roof profile, you are taking a huge gamble. If a leak or other issue arises, the roof manufacturer can easily point to the unapproved attachments as the cause and deny the claim, leaving the building owner with a massive repair bill.
How Does Material Choice Impact Standing Seam Solar Clamp Compatibility?
You’ve done your homework. You've measured the seam, confirmed the dimensions, and found a clamp with the perfect geometric fit. You're ready to order, right? Not quite. If the clamp's metal is chemically incompatible with the roof's metal, you could be setting up a slow-motion science experiment that will destroy both the mount and the roof. This issue, called galvanic corrosion, is a critical and often-overlooked aspect of standing seam solar clamp compatibility.
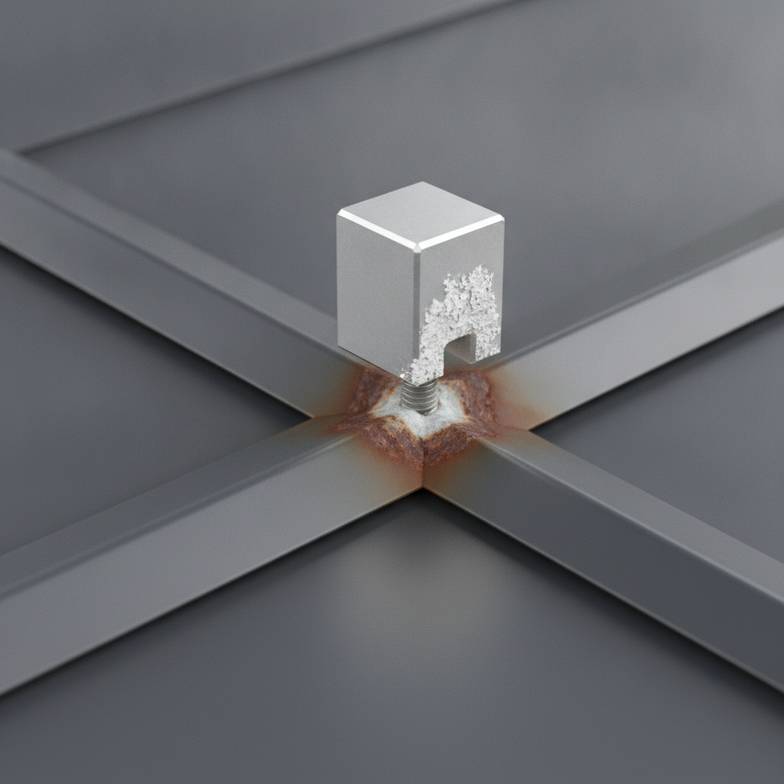
Material choice is crucial for preventing galvanic corrosion. When two different metals are in direct contact in the presence of an electrolyte (like rainwater), one metal will sacrifice itself to protect the other, corroding at a much faster rate. Always ensure the clamp material is compatible with the roof panel material to ensure the long-term durability of the entire system.
Understanding the Galvanic Series
Without getting too deep into the chemistry, different metals have different electrochemical potentials. When connected, the "less noble" metal (more active) becomes the anode and corrodes, while the "more noble" metal (less active) becomes the cathode and is protected.
Aluminum, the most common material for solar clamps, is less noble than steel. This is why it works well with coated steel roofs (like Galvalume® or Zincalume®)—the aluminum clamp corrodes very slowly over decades, essentially sacrificing itself to protect the steel. However, if you pair an aluminum clamp with a much more noble metal like copper, or a much less noble one like zinc, the corrosion rate accelerates dramatically.
We once had a project manager ask for our standard aluminum clamps for a beautiful new architectural copper roof. We had to explain that this pairing would cause the clamps to visibly corrode within a few years, staining the expensive copper and compromising the array's structural integrity. We guided them to a specialized bronze clamp designed for copper roofs, saving them from a costly failure.
Here's a simplified guide for common pairings:
| Clamp Material | Roof Material | Corrosion Risk | Recommendation |
|---|---|---|---|
| Aluminum | Aluminum | Very Low | An ideal match. No galvanic issues. |
| Aluminum | Coated Steel (Galvalume®, Zincalume®) | Low | This is the most common and generally accepted pairing in the solar industry. |
| Aluminum | Zinc or Copper | High | Avoid this pairing. Aluminum will corrode very quickly. Use stainless steel or bronze clamps. |
| Stainless Steel | Coated Steel | Low | A very durable and safe combination, though stainless steel clamps are often more expensive. |
The Role of Gaskets and Separators
To help manage these risks, many high-quality clamps come with a thin EPDM rubber gasket on the underside. This gasket serves two important purposes:
It creates a physical barrier, separating the two metals to stop the galvanic reaction from occurring.
It protects the roof's coating, providing a cushion that prevents the clamp from scratching the paint or protective layer on the roof panel during installation and thermal movement.
When selecting a clamp, check if it includes these protective features, especially if you are working with a premium coated roof panel.
What's the Most Reliable Process for Verifying Standing Seam Solar Clamps?
With all these variables—dimensions, shape, material, set screws—relying on spec sheets and photos alone can still feel like a bit of a guess. And making the wrong choice means you could have thousands of dollars of useless clamps show up on-site, bringing your project to a screeching halt. To eliminate this risk, we recommend a foolproof verification process to guarantee a perfect fit before you place a bulk order.
The safest and most reliable way to verify a clamp is to get a physical sample and test-fit it on an actual spare piece of the roof panel. If a sample test isn't possible, the next best thing is to provide your supplier with a "verification package" containing the roof panel's technical data sheet, detailed photos, and your own precise measurements.
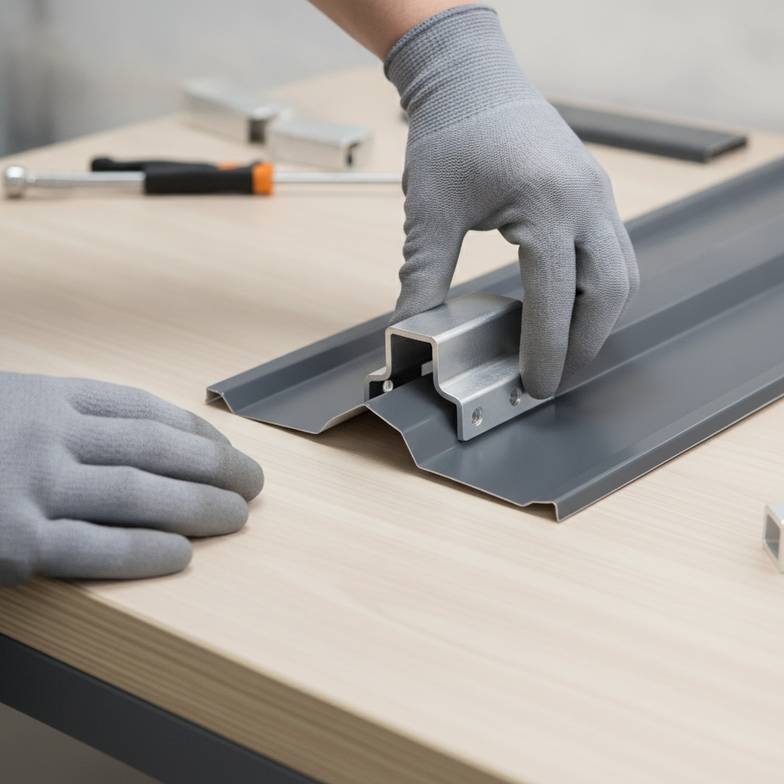
The Gold Standard: The Sample Test
There is simply no substitute for a physical test. It removes all guesswork and gives you, your team, and the building owner complete peace of mind.
Here's how to do it:
Request a sample clamp from your potential supplier. Most reputable suppliers are happy to provide samples for verification.
Get a small off-cut of the exact roof panel being used for the project. The roofing contractor will almost always have leftover pieces.
Physically attach the clamp. Does it slide on smoothly and sit flush against the seam without rocking?
Check the grip. Hand-tighten the set screws. Does the clamp feel solid and secure?
Inspect for damage. After tightening, remove the clamp and inspect the seam. Is there any sign of denting, bending, or scratching? A good fit should leave the seam unmarked.
This simple, 10-minute test is the single best thing you can do to mitigate risk and ensure a smooth, efficient installation.
The Remote Verification Checklist
If you can't perform a physical sample test, you need to provide your supplier with enough information for them to make an expert recommendation. Don't just send an email saying, "I need clamps for a metal roof." Instead, assemble a complete verification package.
Here's what it should include:
The Roof Panel Technical Data Sheet: This is the single most important document. It should contain a precise, dimensioned cross-section drawing of the seam profile. This is the blueprint your supplier will use to match a clamp.
Manufacturer and Profile Name: Include the exact name, like "Butler MR-24" or "Lysaght KLIP-LOK 700." While not sufficient on its own, it provides helpful context.
High-Resolution Photos: Good photos are invaluable. Take pictures showing:
A direct, end-on view of the seam to show its shape.
A side view of the seam.
A top-down view.
Place a ruler or coin next to the seam in the photos to provide a sense of scale.
Your Own Measurements: As a final check, provide the seam height, width, and material thickness that you measured yourself.
A professional supplier can take this package and confidently cross-reference it with their product database to identify the correct clamp, ensuring you get the right parts the first time.
Frequently Asked Questions
Are standing seam solar clamps non-penetrating?
Yes, one of the primary benefits of standing seam solar clamps is that they are a non-penetrating mounting solution. They work by gripping the raised seam of the metal roof panel, which avoids drilling holes into the roof surface. This preserves the roof's integrity and its warranty.
Do I need a special tool to install these clamps?
For most clamps, the only special tool you need is a calibrated torque wrench. This is used to tighten the set screws to the exact torque value specified by the manufacturer. Using a torque wrench is essential to ensure a secure grip without crushing or damaging the roof seam.
Can I use standing seam solar clamps on any metal roof?
No, they are designed exclusively for standing seam metal roofs. They will not work on other common metal roof types like corrugated, trapezoidal (R-panel), or metal shingles. These other profiles require different mounting solutions, such as hanger bolts or specialized brackets that attach to the roof structure below.
How far apart should I space the clamps?
Clamp spacing is not something you should guess. It must be determined by a structural analysis conducted by a qualified engineer or your mounting system supplier. The correct spacing depends on your project's specific wind and snow loads, the gauge and profile of the roof panel, the underlying roof structure, and the solar module's clamping zone requirements.
Conclusion
Successfully choosing the right standing seam solar clamps comes down to a systematic process of verification, not guesswork. By moving beyond simple marketing names and focusing on the critical details—precise dimensions, material compatibility, and physical testing—you can eliminate procurement errors and ensure a secure, durable, and leak-free solar installation. Remember to measure the seam, watch out for galvanic corrosion, and when in doubt, always test a sample. This diligence upfront will save you from enormous costs and headaches down the road.
At XINVOK, we help installers, EPCs, and distributors navigate this process every day. If you're planning a project and need to ensure you have the right components, send us your verification package—your roof panel data sheet, drawings, photos, and project requirements. We'll help you identify the correct, compatible mounting solution and provide a transparent quotation to keep your project on budget and on schedule.
For further project planning, read our guides to standing seam versus trapezoidal roof mounting and preparing a solar mounting RFQ.
Written by
XINVOK Technical Team
Practical solar mounting knowledge for EPC teams, distributors and project buyers.
Project inquiry
Talk to Our Team
Share your project location, module size, mounting type, quantity and customization requirements.