
How to Prevent Roof Leaks Around Solar Mounting Attachments
Installing a solar array is a fantastic investment, but the thought of drilling dozens of holes into a perfectly good roof can be unsettling. The primary worry we hear from installers and project owners alike is the risk of causing leaks. A single, slow drip from a poorly sealed fastener can go unnoticed for years, leading to hidden rot, mold, and expensive structural damage. The key to preventing roof leaks around solar mounting attachments isn't a single magic product, but a systematic approach that combines the right product selection with a diligent, professional installation.
To prevent roof leaks, you must implement a multi-step process. This involves selecting a mounting system specifically designed for your roof type (shingle, metal, or tile), using the correct waterproofing method like mechanical flashing or high-grade sealants, and ensuring a high-quality installation that follows the manufacturer’s torque specifications and procedures. It's a combination of the right hardware and the right hands.
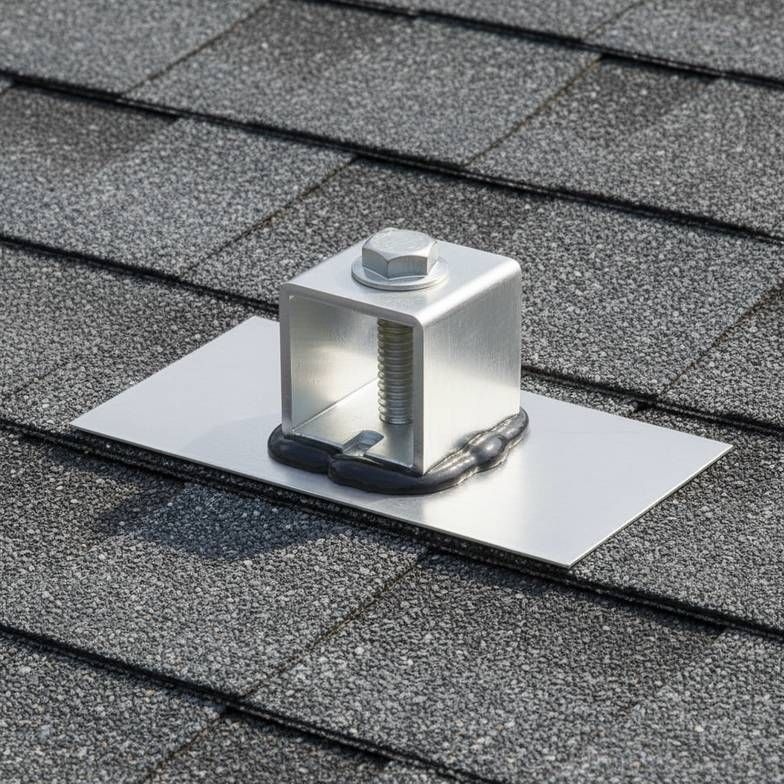
So, if preventing leaks is a process, what does that process actually look like? It's about making informed decisions at every step, from procurement to the final bolt torque. Let’s break down exactly how you can ensure your solar installation remains watertight for the entire life of the system.
What Makes a Roof Attachment System Leak-Proof?
Are you worried that a small, overlooked component in your bill of materials could be the weak link? You're right to be concerned. A tiny, low-quality gasket or an incompatible fastener can compromise the entire system and lead to a massive headache down the line.
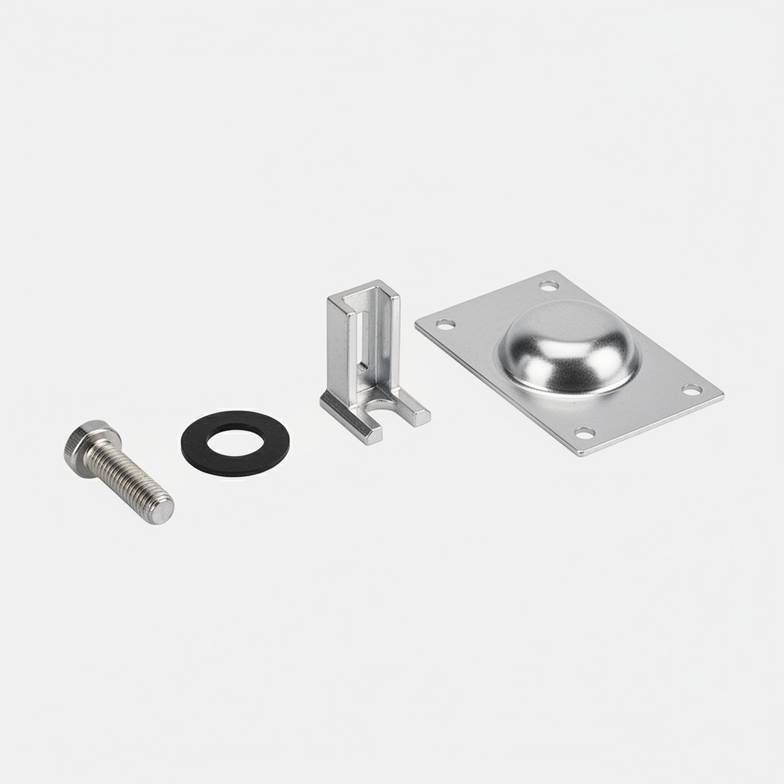
A truly "leak-proof" system is a team of components working in harmony. It includes a durable mount, a compatible waterproofing element (like metal flashing or a sealed base), and high-grade fasteners. All of these parts must be designed to work together on your specific roof.
Dive Deeper: It’s a System, Not Just a Single Part
From my experience helping customers specify parts, the most reliable projects are the ones where the buyer understands how each component contributes to the whole. A leak is simply a path for water, and a good mounting system is designed to eliminate every possible path.
Here are the critical parts of the system you should be evaluating:
The Attachment Body: This is the core component that transfers the load from the rails to the roof structure. Most high-quality mounts are made from 6005-T5 anodized aluminum. This material provides an excellent strength-to-weight ratio and, crucially, is highly resistant to corrosion. A rusty mount can fail structurally and compromise the seal around it.
The Waterproofing Layer: This is where the magic happens. You generally have two options, and the right choice depends on your roof.
Mechanical Flashing: This is the gold standard for asphalt shingle roofs. An aluminum flashing plate is designed to slide under the shingle course above the penetration point. It acts like a tiny, integrated piece of roof, mechanically diverting water over and around the hole. It doesn't rely on a chemical seal to do the heavy lifting.
Sealants & Gaskets: For many metal roofs or specialized mounts, the seal is chemical. This relies on high-quality gaskets, typically made from EPDM (ethylene propylene diene monomer). A good EPDM gasket will resist UV degradation and temperature extremes for decades, maintaining a flexible, compressed seal. Often, this is paired with a high-performance roofing sealant applied in the pilot hole or under the attachment as a secondary barrier.
The Fasteners: The bolt holding it all together is more important than you think. You should always look for stainless steel (like A2-70 / SUS304) lag bolts. They won't rust and fail. Many solar-specific lag bolts also come with their own integrated EPDM washer, providing another layer of sealing right at the head of the fastener. The length is also critical—it must be long enough to solidly engage the roof rafter below the decking.
When you're sourcing parts, don't just ask for a "roof mount." Ask for the material specs on the mount, the flashing, the EPDM gasket, and the fasteners. A reliable supplier will have this information ready for you.
How Does Roof Type Change Your Mounting Strategy?
You wouldn't use the same tires for a race car and a farm tractor, right? The same logic applies to solar installations. Using the wrong attachment for your roof type is one of the fastest ways to guarantee future roof leaks around solar mounting attachments.
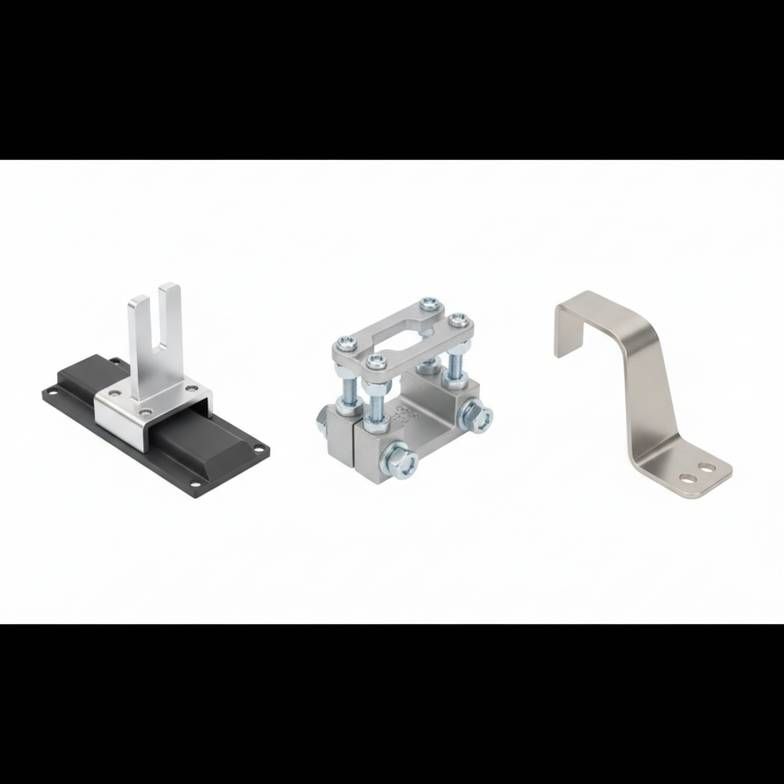
Your roof’s material, profile, and underlying structure dictate the correct attachment method. Each roof type—be it common asphalt shingle, versatile metal, or classic tile—requires a unique mounting component and waterproofing technique to avoid damaging the roof and creating a path for water.
Dive Deeper: A Mount for Every Roof
Let's look at the most common roof types and the corresponding best practices. I've seen installers try to force the wrong solution onto a roof to save time, and the resulting callbacks always cost more than doing it right the first time.
For Asphalt Shingle Roofs
This is the most common residential roofing material and, unfortunately, where many leaks happen if care isn't taken.
The Solution: Use a flashed attachment, such as an L-foot paired with a thin aluminum flashing.
How it Works: The installer locates a rafter, drills a pilot hole, fills it with sealant, and fastens the mount. Then, the flashing is slid up and under the course of shingles directly above the mount. The next shingle sits on top of the flashing, creating a layered, water-shedding system, just like the rest of your roof. The hole is covered, and water is mechanically diverted away.
For Metal Roofs
Metal roofs are fantastic for solar but come in different profiles.
Standing Seam Metal: This is the absolute best-case scenario. Use non-penetrating seam clamps. These clamps simply tighten onto the raised vertical seam of the roof panels. There are no holes, no sealants, and virtually no chance of leaks. The key is to make sure the clamp profile matches your roof's seam profile exactly.
Trapezoidal or Corrugated Metal: For these "through-fastened" roofs, you have to penetrate the metal sheet. The solution is a profiled mounting bracket with a high-quality EPDM gasket on the base. The bracket or L-foot is fastened through the "high" part of the corrugation, and the EPDM gasket is compressed between the mount and the metal sheet to create a durable, watertight seal.
For Tile Roofs
Tile roofs are the most complex and require a skilled hand. One broken tile can create a huge leak.
Tile Hooks: The most common method. A flat, sturdy hook is bolted to the roof deck (into a rafter) and curves up and out from underneath a tile. The rail then attaches to this hook. The tile above it is carefully replaced. This requires temporarily removing a tile but doesn't involve drilling through it.
Standoffs: This involves removing a tile, installing a metal post (a standoff) with flashing directly to the roof deck, and then carefully cutting or grinding the tile to fit around it. It's more invasive but creates an incredibly strong and well-sealed connection point.
Here's a quick comparison table for your reference:
| Roof Type | Primary Attachment | Waterproofing Method | Key Consideration |
|---|---|---|---|
| Asphalt Shingle | L-Foot or Flashed Mount | Aluminum Flashing + Sealant | Must hit rafters; proper flashing placement is critical. |
| Standing Seam | Seam Clamp | Non-Penetrating | No holes in roof; verify seam profile compatibility. |
| Trapezoidal Metal | Profiled Bracket | EPDM Gasket + Sealant | Gasket must match roof profile; proper torque is vital. |
| Tile | Tile Hook or Standoff | Under-tile Placement / Flashing | High risk of tile breakage; requires an experienced installer. |
Why is Installation Quality the Most Critical Factor?
You've done your homework. You've sourced the best mounting hardware from a trusted supplier. But if the installation crew is rushed, untrained, or just having a bad day, your project is still at high risk for leaks and callbacks.
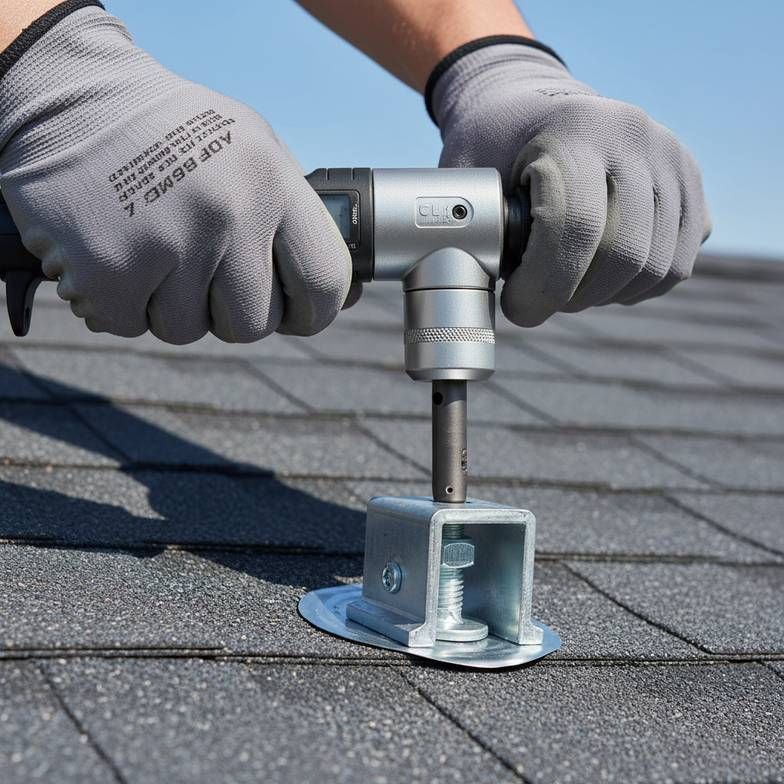
Even the most premium, over-engineered components will fail to prevent roof leaks around solar mounting attachments if they are not installed correctly. Things like proper surface preparation, using the correct torque, and following the manufacturer's installation manual are absolutely non-negotiable for a long-lasting, leak-free system.
Dive Deeper: The Installer Holds the Keys to a Dry Roof
As a supplier, we can provide the best components and the clearest instructions, but the final quality check happens on the roof. I always tell buyers that investing in a well-trained installation crew is just as important as investing in good hardware. Here are the make-or-break steps that every project manager should ensure are being followed.
Pre-Installation: Setting the Stage for Success
Clean the Surface: Any dirt, grit, or debris left on the roof surface where a gasket will sit or flashing will slide is a potential channel for water. The area must be clean and dry.
Locate the Rafters: For shingle roofs, this is mission-critical. Lag bolts must anchor into the solid wood of a rafter, not just the thin roof decking. A good stud finder is an installer's best friend. Missing the rafter means the connection is weak and not watertight.
Drill the Right Pilot Hole: The pilot hole should be slightly smaller than the diameter of the lag bolt. Too big, and the threads won't get a solid grip. Too small, and you risk splitting the rafter. Most importantly, the pilot hole should be filled with a high-quality roofing sealant before the lag bolt is driven in. This provides a crucial secondary seal.
During Installation: Why Torque is Everything
You can't just tighten the bolts until they feel "tight enough." Using a calibrated torque wrench is one of the biggest differentiators between an amateur and a professional job.
Under-torquing: If the bolt isn't tight enough, the EPDM gasket or washer won't compress properly. This leaves a small gap that water will inevitably find.
Over-torquing: This is just as bad, if not worse. Too much force can crack the mount, strip the wood in the rafter, or completely destroy the EPDM washer by squeezing it out of shape. A damaged washer offers no sealing properties.
Every manufacturer provides a recommended torque value (e.g., 16-20 N·m). Ask your supplier for this specification and ensure your installation team has—and uses—a torque wrench.
Post-Installation: The Final Check
A quick visual inspection can catch 90% of potential issues. Walk the roof and check: Is the flashing sitting flat and properly layered under the shingle? Can you see that the EPDM gasket is uniformly compressed? Are there any cracked tiles or damaged shingles near the work area? This final check takes minutes but can save you thousands.
Frequently Asked Questions
Can I just use roofing sealant instead of flashing?
For shingle roofs, this is highly discouraged. Flashing provides a permanent, mechanical barrier to divert water. Sealant is a chemical barrier that can degrade over years of exposure to UV rays and temperature changes. Think of sealant as a secondary defense, not the primary one. Flashing is the industry best practice.
How do I know if a solar mounting attachment is compatible with my roof?
Always consult the manufacturer's documentation and datasheets. A good supplier will ask for your specific roof details—like the material and, for metal roofs, the exact panel profile and dimensions. Never assume a "universal" mount will work perfectly. It's better to verify upfront.
What material is best for roof attachments?
Anodized aluminum (like grade 6005-T5) is the standard for high-quality mounts because it's strong, light, and extremely resistant to rust. For the fasteners that go into the roof, you should insist on stainless steel (A2-70 or SUS304) to prevent corrosion, which is a common point of failure over the long term.
Do non-penetrating clamps for metal roofs ever cause leaks?
When installed correctly on a compatible standing seam, these clamps are exceptionally reliable because they create no holes. However, problems can arise if the wrong clamp is used for the seam profile or if the set screws are over-torqued. This can damage or "unzip" the seam, compromising the roof's integrity.
Conclusion
Ultimately, ensuring a leak-free solar installation comes down to a disciplined process, not a single miracle product. The fear of roof leaks around solar mounting attachments can be completely eliminated by focusing on three key areas. First, you must select the right system for your specific roof type. Second, verify the quality of all the components, from the aluminum mount down to the stainless steel fasteners and EPDM washers. And third, you must ensure a meticulous, professional installation that follows manufacturer guidelines, especially regarding torque. By managing the process from procurement to final inspection, you protect your asset, your reputation, and your investment for decades to come.
If you are planning a solar project and need help selecting the right mounting components, our team is here to assist. Submit your project details, and we can provide a detailed proposal and quotation to ensure you get a secure, reliable, and watertight solution.
Written by
XINVOK Technical Team
Practical solar mounting knowledge for EPC teams, distributors and project buyers.
Project inquiry
Talk to Our Team
Share your project location, module size, mounting type, quantity and customization requirements.