Flat Roof Solar Mounting: Tilt Angle, Row Spacing, and Roof Load Explained
Struggling to plan your commercial flat roof solar project? You're likely trying to squeeze the most energy production out of your available space, but you're also worried about complex issues like panel shading, wind forces, and—most importantly—overloading the roof structure. The good news is that mastering the fundamentals of flat roof solar mounting isn't about memorizing complex formulas; it's about understanding a few key trade-offs.
The optimal design for flat roof solar mounting is a project-specific balance between the panel tilt angle, the spacing between rows, and the total load the roof can safely support. A steeper tilt angle can increase energy yield per panel but requires wider spacing and more ballast weight, while a lower tilt angle allows for higher module density and a lighter system, which is often necessary for roofs with limited structural capacity.
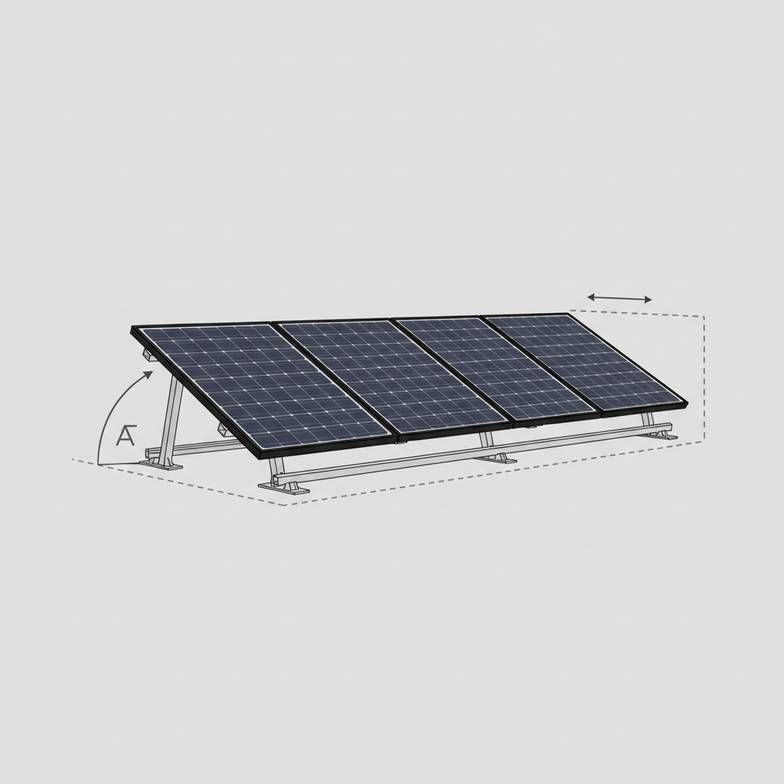
Now that you know these three elements are completely interconnected, how do you find the right balance for your specific project? It's less about finding a single "best" number and more about knowing which questions to ask. Let's break down how these variables influence each other and what it means for your bottom line.
What's the Optimal Tilt Angle for Flat Roof Solar Mounting?
You want to get the most kilowatt-hours out of every single solar panel you install. It's a natural starting point. So, you might think a steeper tilt angle, perfectly aimed at the sun, is always the best choice. But here's the thing: that steeper angle can dramatically increase your project's cost and risk, sometimes for only a small gain in energy. The "optimal" angle is almost always a compromise.
The best tilt angle for your flat roof solar mounting system is a trade-off. A higher tilt (e.g., 15-25 degrees) can maximize energy generation per panel, especially in winter. However, a lower tilt (e.g., 5-10 degrees) reduces wind load, requires less ballast weight, and allows you to fit more panels on the roof, often leading to a better overall return on investment.
Dive Deeper: The Yield vs. Density Trade-Off
A common question we get from installers is, "Should I set the panels at 5 or 15 degrees?" The answer depends entirely on your project's goals and constraints. It's a classic engineering puzzle: do you want the best-performing individual panels, or do you want the best-performing system overall?
The Case for a Low Tilt Angle (5-10 Degrees)
For most commercial flat roof projects I've worked on, a low tilt angle is the winner. Here's why:
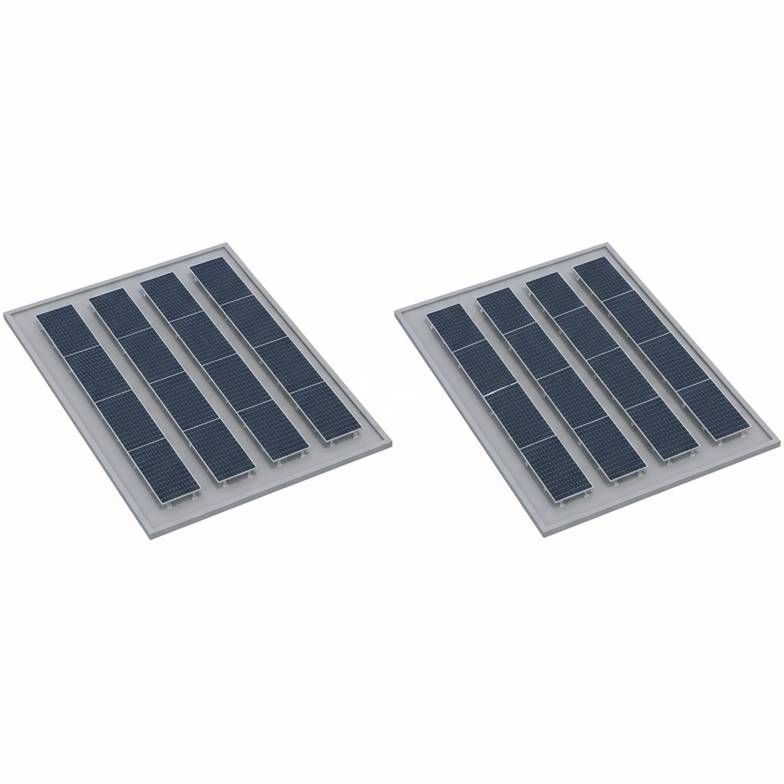
Higher Panel Density: With a lower profile, you can pack rows closer together without causing shading. This means more total panels—and more total generating capacity—on the roof. Your total system size (kWp) is often the most important factor.
Lower Structural Load: A low-tilt panel acts less like a sail in the wind. This reduces the wind uplift forces, meaning you need less ballast (heavy concrete blocks used to hold the system down) to keep it secure. Less ballast means less weight on the roof structure.
Lower System Cost: Less ballast means lower material and transportation costs. A simpler, low-profile racking system can also be cheaper and faster to install, reducing labor expenses.
The result is often a lower Levelized Cost of Energy (LCOE), which is the true measure of a project's financial viability.
The Case for a Higher Tilt Angle (15+ Degrees)
So, is a higher tilt ever the right move? Yes, in certain situations:
Abundant Roof Space: If you have a massive roof and your goal isn't to max out the space, you can afford the wider row spacing that a steeper tilt requires.
High Winter Energy Needs: In northern latitudes where the winter sun is low in the sky, a steeper tilt can significantly boost energy production during those months. This can be critical for facilities with consistent year-round energy demands.
Improved Self-Cleaning: A tilt angle of 10 degrees or more helps rain and snow slide off more effectively, reducing soiling losses and cleaning maintenance over the system's lifetime.
Here's a simplified comparison:
| Feature | Low Tilt (5-10°) | High Tilt (15-25°) |
|---|---|---|
| Energy per Panel | Good | Excellent |
| Total Panels on Roof | More | Fewer |
| Ballast Required | Less | More |
| Total Roof Load | Lower | Higher |
| Inter-Row Spacing | Narrow | Wide |
| Typical LCOE | Often Lower | Often Higher |
Ultimately, the decision comes down to running the numbers for your roof, your electricity rates, and your project budget.
How Does Tilt Angle Affect Row Spacing and Shading?
You've landed on a potential tilt angle. The next logical step is figuring out how to lay out the rows. If you place them too close together, you'll create a domino effect where the front row casts a shadow on the row behind it. This inter-row shading is a project killer, as even a small amount of shade on a modern solar panel can disproportionately slash its output.
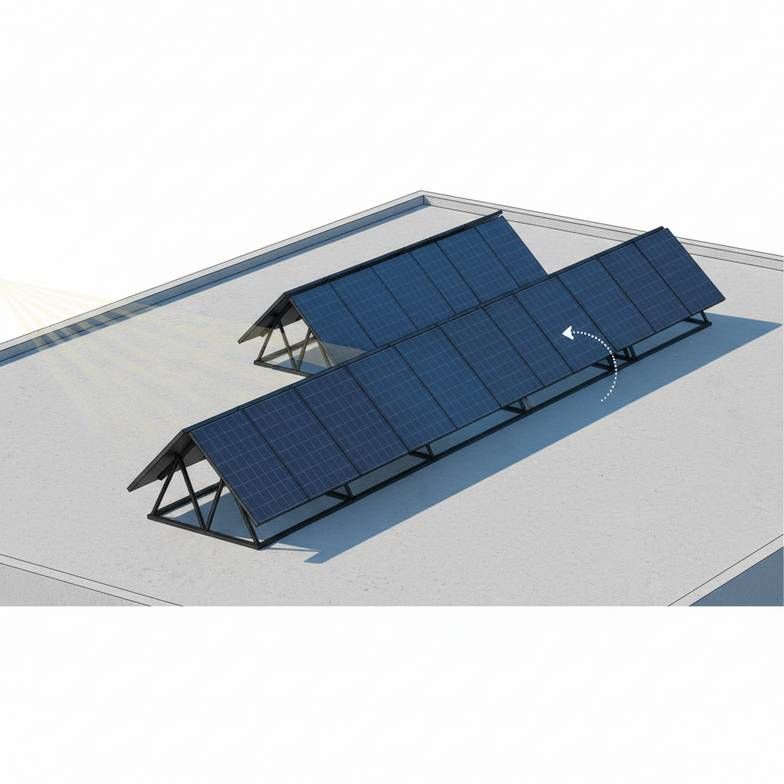
Row spacing for a flat roof solar mounting project is directly determined by the panel tilt angle and the project's geographic latitude. To prevent energy-killing inter-row shading, the distance between rows must be great enough so that the shadow from one row does not fall on the next row during peak sun hours, which vary depending on the season and location.
Dive Deeper: Calculating Minimum Row Spacing
The basic geometry is simple: the taller the object, the longer the shadow. In our case, the "height" of the tilted panel array determines the shadow length. This height depends on the length of the solar module and the tilt angle you've chosen. A 20-degree tilt creates a much taller profile—and a longer shadow—than a 5-degree tilt.
Why Your Project's Location Matters
The second critical factor is the sun's path across the sky, which is unique to your project's latitude. The sun is much lower in the sky during winter in Helsinki than it is in Cairo.
To avoid shading, engineers perform a "solar access" or "shading analysis." They use software to model the sun's lowest angle on the winter solstice (usually December 21st in the Northern Hemisphere) at your specific location. The layout is then designed to ensure that even on this day, the panels are shade-free during the most productive hours (e.g., 9 a.m. to 3 p.m.).
For a project I was consulting on in Boston, the client initially wanted a 15-degree tilt to maximize winter production. However, the shading analysis showed this would require such wide row spacing that they would lose nearly 30% of their potential panel capacity. We ran the numbers again with a 7-degree tilt. The wider spacing was gone, they could fit more panels on the roof, and the total annual energy production was actually higher, even with a slightly less "optimal" tilt per panel.
Illustrative Spacing (For Example Only!)
To give you a concrete idea, here is how tilt can affect spacing. Warning: These are simplified examples. Do not use them for actual project design. A proper shading analysis from a qualified designer is required.
| Tilt Angle | Module Length | Approximate Row Spacing* | Notes |
|---|---|---|---|
| 5° | 2 meters | ~2.3 meters | Allows for very high density. |
| 10° | 2 meters | ~2.7 meters | A common compromise. |
| 15° | 2 meters | ~3.2 meters | Starts to reduce panel density significantly. |
| 20° | 2 meters | ~3.8 meters | Only suitable for roofs with ample space. |
\Assumes a mid-latitude location and is for illustrative purposes only.*
The takeaway is clear: Tilt angle and row spacing are not independent choices. You choose them together as part of a single layout strategy.
How Do You Assess Roof Load for a Flat Roof Solar Mounting System?
You've designed a beautiful, shade-free layout that seems perfect. Now for the most important reality check: can your roof actually hold it? This is, without a doubt, the most critical question in any flat roof solar mounting project. Getting it wrong can lead to catastrophic structural failure, voided roof warranties, and massive financial liability.
To assess roof load, you must compare the total calculated weight of the solar system against the roof's available structural capacity. This total weight includes the solar panels, the mounting racks, and any ballast. This comparison must be performed and certified by a qualified local structural engineer who reviews the building's original structural drawings.
Dive Deeper: Understanding Total System Weight and Roof Capacity
Many people underestimate the total weight of a "non-penetrating" solar array. Because we aren't drilling into the roof deck, we have to use weight—ballast—to fight against the forces of nature, especially wind.
What Makes Up the Total System Weight?
The load you are adding to the roof, typically measured in pounds per square foot (psf) or kilograms per square meter (kg/m²), comes from three sources:
PV Modules: A typical commercial solar panel weighs around 50 lbs (23 kg).
Mounting Hardware: The aluminum or steel rails, feet, and clamps add another 1-2 psf.
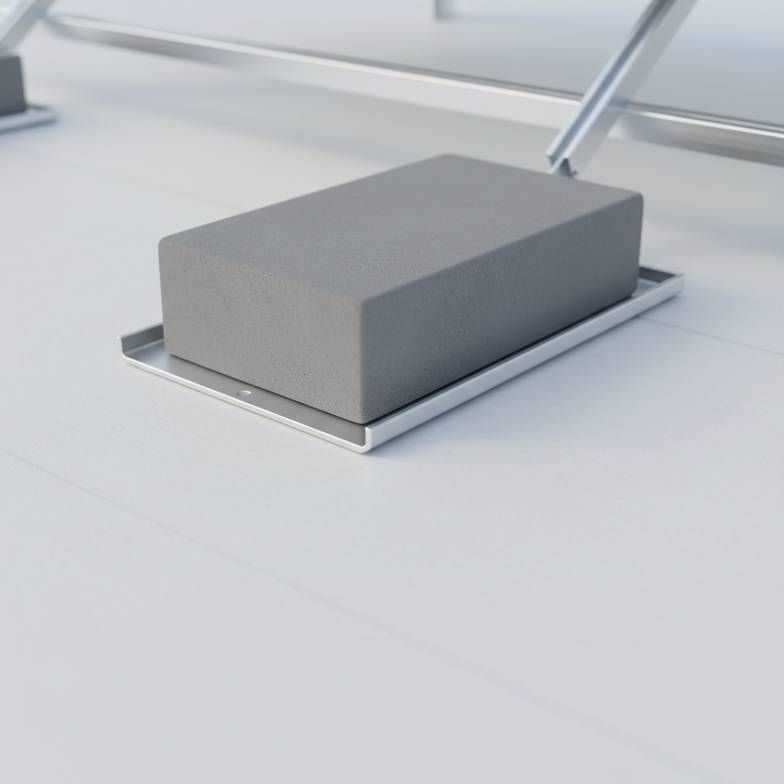
Ballast: This is the heavyweight. Concrete pavers are used to counteract wind uplift. The amount of ballast needed is calculated based on a wind load study for your specific building, factoring in its height, location, and the tilt angle of the panels. It's not uncommon for the total system weight to be in the 4-7 psf range, and sometimes much higher in windy areas.
A steeper tilt angle catches more wind, requiring more ballast, which in turn adds more dead load to the roof. This is another reason why low-tilt systems are so popular; they are simply lighter.
Distributed Load vs. Point Load
It's also important to understand how that weight is applied. A ballasted flat roof solar mounting system is designed to spread the weight evenly across the roof surface through its base plates. This is called a distributed load.
However, if the roof has sensitive insulation or the total weight is too high, an attached system might be considered. This involves mechanically fastening the racking to the roof's structural members (e.g., steel joists or concrete beams). This creates point loads—very high concentrations of force at each attachment point. Both load types must be verified against the building's structural plans.
Here's the process we always recommend to clients before we can even provide a firm quotation:
Obtain the Roof's Structural Drawings: These are the blueprints that show what the roof is made of and how much load it was designed to carry.
Hire a Local Structural Engineer: No exceptions. A qualified engineer in your area will review the drawings, inspect the roof's current condition, and determine its "available load capacity." This is the margin you have to work with.
Provide the Engineer with the Proposed System's Load: We, as the mounting supplier, provide a preliminary report detailing the system's weight and where it will be placed. The engineer then signs off, confirming the roof can handle it.
This process protects everyone: you, the building owner, and the installers.
Frequently Asked Questions
What is a ballasted vs. a non-penetrating solar mounting system?
These terms are often used interchangeably. A ballasted system is a type of non-penetrating system that uses weight (ballast blocks) to hold the solar array in place against wind and other forces. This avoids making holes in the roof membrane, which is ideal for preserving the roof warranty and preventing leaks.
How much does a typical flat roof solar mounting system weigh?
There is no "typical" weight, as it's project-specific. It can range from 3 to over 10 pounds per square foot (psf). The final weight depends on the wind loads at your site, the building's height, and the system's tilt angle. A qualified engineer must calculate the precise load for your specific design.
Do I need a structural engineer for my flat roof solar project?
Yes, absolutely. Engaging a licensed structural engineer is a non-negotiable step for any commercial flat roof solar installation. They are the only ones qualified to verify that the building's structure can safely support the added weight of the solar array for the next 25+ years. It is a critical step for safety, code compliance, and insurability.
How does wind affect my flat roof solar mounting design?
Wind is the most significant force your system must resist. It creates both downward pressure and, more critically, an upward lift force that tries to pull the panels off the roof. A wind load analysis, based on local building codes (like ASCE 7 in the US), determines the amount of ballast or number of attachments needed to keep the array secure.
Conclusion
Optimizing a flat roof solar mounting system isn't about finding a magic number for the tilt angle. It's a methodical process of balancing competing priorities. You are making a calculated trade-off between maximizing energy per panel (higher tilt), maximizing total panels on the roof (lower tilt and denser spacing), and respecting the absolute physical limits of the building structure. The key is to shift your focus from "what's the best angle?" to "what information do I need to engineer the best system for this specific roof?" By gathering your site details, module specifications, and, most importantly, a structural assessment of your roof, you can make an informed decision that ensures your project is safe, productive, and profitable for decades.
Ready to find the right balance for your project? Send us your site details, roof plans, and module specifications, and our team can help you prepare a suitable flat roof solar mounting proposal and quotation.
Written by
XINVOK Technical Team
Practical solar mounting knowledge for EPC teams, distributors and project buyers.
Project inquiry
Talk to Our Team
Share your project location, module size, mounting type, quantity and customization requirements.